3D workshop & DIY
A 3D-printable hydroponic jar lid: the Propagation Lid
Functional diagram, not to scale.
A lid with a built-in net pot that turns any jar into a mini Kratky garden: garlic, green onions, basil, cilantro, cuttings. Two sizes, three hours of printing, no supports.
It is the simplest and most useful part in the workshop: a lid with a built-in net pot that sits on a glass jar. A garlic clove, a basil cutting or a few seeds in a cube, water and nutrient solution: the jar becomes a mini Kratky garden, with no pump and no electricity.
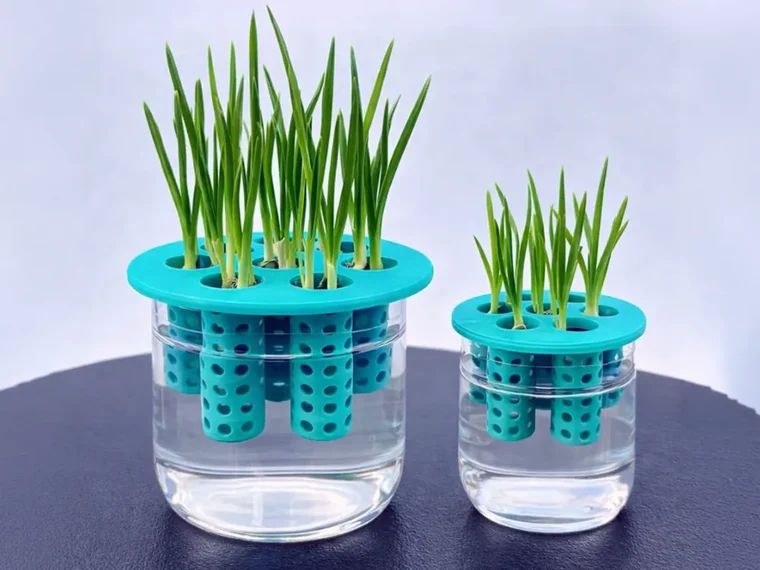
1. Hydroponic Propagation Lid, by Rene Czerner
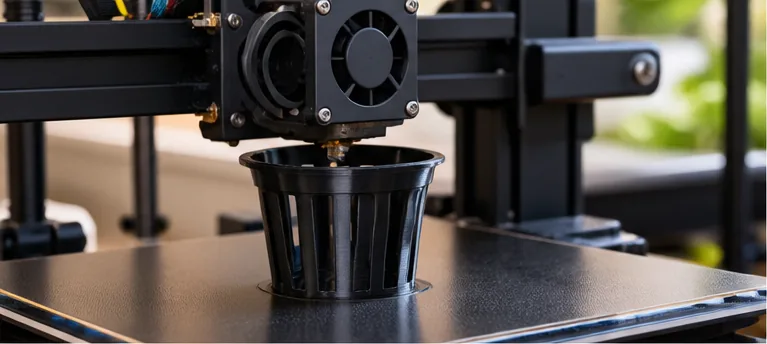
A lid whose net pot is printed in one piece with it, perforated to let roots and water through. It holds the plant upright and keeps the crown out of the water. The designer has published a second version that fixes the printing issues reported by users.
| For | Garlic, green onions, basil, cilantro, seedlings, cuttings |
|---|---|
| Sizes | 70 mm in diameter by 40 mm tall, or 100 mm by 50 mm (about 2.75 by 1.5 in, or 4 by 2 in) |
| Printing | 0.24 mm layers, 15% infill, no supports, about 3 hours per build plate |
| Material | PETG recommended, PLA possible |
| License | Creative Commons BY-NC-SA 4.0: credit the designer, no commercial use |
2. Putting it to work
From printed lid to your first basil
- Measure the jarBefore printing: a 70 or 100 mm (2.75 or 4 in) opening; the lid should sit without any play.
- Make the jar opaqueA kraft paper sleeve, a sock, paint or tape: no light, no algae. Leave a slit to see the water level.
- Prepare the solutionA, then B, EC first, then pH. See pH and EC.
- FillUntil the water just touches the bottom of the net pot, no higher.
- Put the plant inA seed cube, a cutting held in place by a few clay pebbles, or a garlic clove set pointy end up.
- Let the level dropOver the days, the level goes down and leaves an air gap: that is where the roots breathe. When only a third is left, top up to half, without drowning the upper roots.
3. Things to watch
- Light in the jar: clear glass looks nice, but algae love it. A removable sleeve lets you show the roots to visitors.
- Keep the crown dry: the base of the stem must not sit in water, or it will rot.
- Hygiene: between crops, rinse the lid with lukewarm water and diluted white vinegar; no dishwasher, printed plastic warps.
- Garlic and onions: in a jar, you mostly harvest the green shoots, not new garlic bulbs.
To go further: sowing, taking cuttings and dividing herbs, and the apartment garden, where the windowsill is jar territory.
Are your jars on the forum? The “My first jar” challenge is open.
Frequently asked questions
Which lid size should I print?
Measure the opening of your jars before printing. The model comes in 70 mm and 100 mm (2.75 and 4 in) diameters; a lid that is too loose lets light in and falls into the jar.
Do I need an air pump with this lid?
No. It is used for Kratky: the level drops over the days and leaves an air gap where the roots breathe. Do not raise the water back up to the net pot once the roots are established.
PLA or PETG?
The designer recommends PETG, which handles water and washing better. PLA is fine for a trial. Either way, rinse the lid between crops in lukewarm water, not in the dishwasher.