Part II · Design
Drip irrigation and Dutch buckets: the system for large plants
Tomatoes, cucumbers, peppers, strawberries: large plants thrive in a bucket of growing medium fed by drip irrigation. The principle, the hardware, a bucket cross-section, closed loop or drain to waste, setting drainage with a calculator, building four buckets step by step, and dripper maintenance.
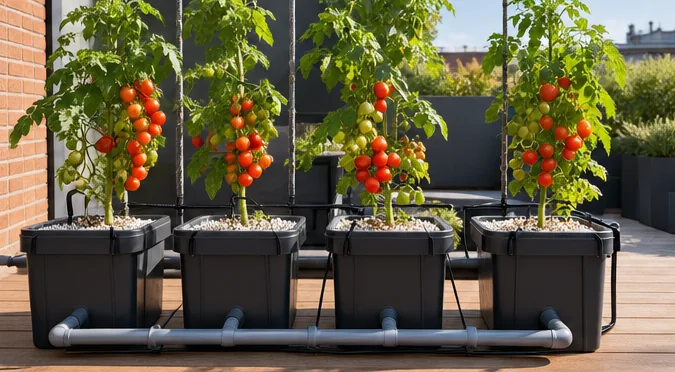
A two-meter (6.5 ft) indeterminate tomato, a climbing cucumber, a pepper plant loaded with fruit: large plants need a big root volume, sturdy support and water that does not stagnate. That is exactly what the Dutch bucket offers: one bucket of growing medium per plant, one dripper, and a shared return to the reservoir. Here is the principle, the hardware, setting drainage with a calculator, and building four buckets step by step.
To compare with other systems: choosing your system, DWC and air pumps, ebb and flow.
1. The principle
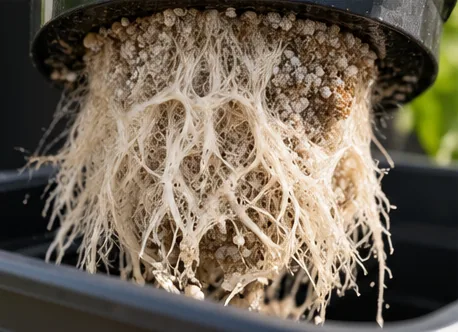
In a tower, NFT or DWC, the roots sit in the solution or in a film of water. Here, they grow in a growing medium that holds a little water and a lot of air, and the solution arrives drip by drip, in small repeated doses. The excess passes through the medium and drains out the bottom.
- A large root volume, so a better buffer than NFT: the growing medium can ride out a pump failure of a few hours (Oregon State University).
- Air without an air pump: the porous medium is enough to oxygenate the roots.
- Each bucket is independent: you prune, stake, harvest or replace a plant without touching the others.
- The top score for strawberries: in a University of Georgia and Purdue trial (2025), drip-fed growing medium produced far more strawberries than NFT, the vertical tower and aeroponics. See strawberries in hydroponics.
2. Which crops?
| Well suited | Possible | Better elsewhere |
|---|---|---|
| Indeterminate tomatoes, cucumbers, sweet and hot peppers, eggplants, zucchini, pole beans, small melons (Oregon State University) | Strawberries (two or three plants per bucket), large perennial herbs | Lettuce, baby greens, basil: too many buckets for small plants; towers, NFT or Kratky do better |
For tomatoes, see also growing tomatoes hydroponically; for chiles, hot and sweet peppers.

3. The hardware
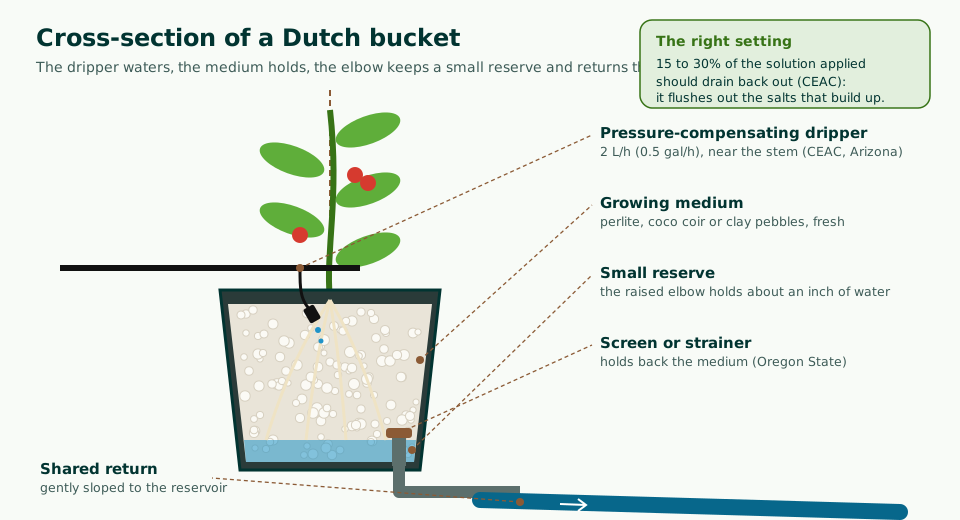
- Buckets of about ten liters (2.5 gal), opaque, food-grade plastic (HDPE), never ones that held paint or pesticide (Oregon State University). Commercial Dutch buckets already have the recessed bottom and the elbow; a drilled hardware-store bucket also works.
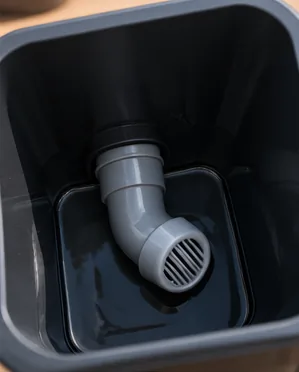
- A drain elbow at the bottom, with a screen or strainer that holds back the growing medium (Oregon State University). Raised a few centimeters (about an inch), it keeps a small reserve.
- The growing medium: perlite, coco coir, clay pebbles or a mix (see growing media). Fresh for each crop.
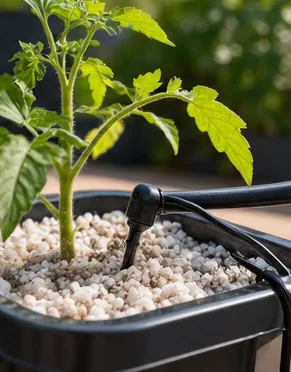
- Pressure-compensating drippers of about 2 L/h (0.5 gal/h), one per plant, or one per head for a multi-stem plant (University of Arizona). “Pressure-compensating” means every dripper delivers the same flow, at the start as well as at the end of the line.
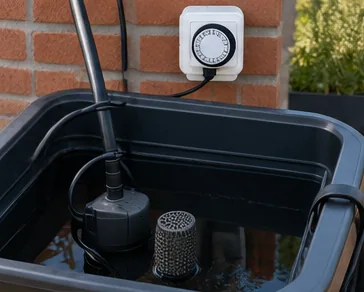
- An opaque reservoir, a pump, a filter ahead of the line, a programmable timer (see choosing your pump).
- A shared return pipe, gently sloped toward the reservoir, or toward a collection bucket.

4. Closed loop or drain to waste?
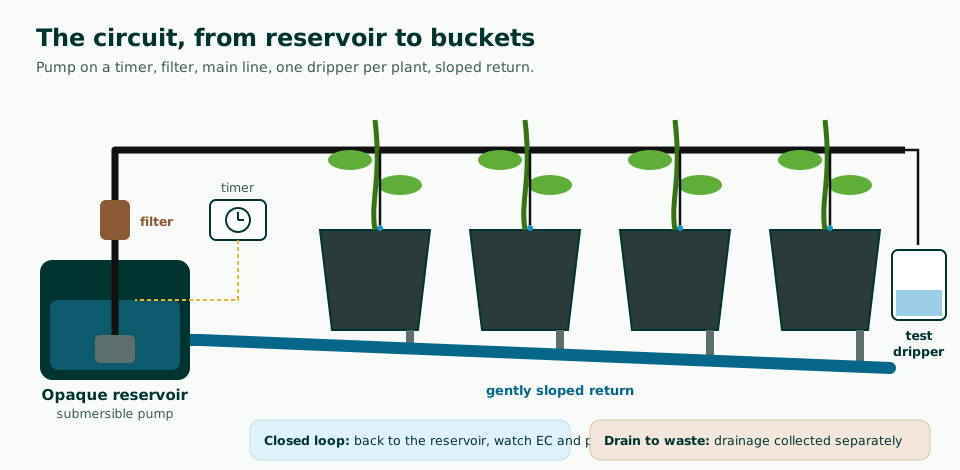
Closed loop
- Drainage flows back to the reservoir.
- Saves water and nutrients.
- EC and pH drift: measure at least twice a week.
- A root disease spreads from one bucket to another through the water.
- The solution must be replaced regularly.
Drain to waste
- Drainage goes into a collection bucket.
- Always fresh solution at the plants’ roots.
- Simpler, healthier.
- Uses more; the drainage, diluted, can water ornamental plants.
5. Setting the watering: drainage
The plant takes up water faster than salts: without drainage, salts build up in the growing medium until they burn the roots (Lieth et al., University of California Davis). Hence the golden rule of drip irrigation: part of the solution must come back out at the bottom.
- How much? 15 to 30% of the solution applied according to the University of Arizona, 10 to 20% according to Ohio State University for container crops. Less than that, water more often; more, water less.
- How to measure? A test dripper over a container gives the amount applied; collect the drainage from one bucket for 24 hours, measure both volumes, then the EC and pH of the drainage (University of Arizona).
- In small doses: 60 to 120 ml (2 to 4 fl oz) per watering for a mature plant, 40 to 50 ml six to eight times a day for a young plant (University of Arizona). Several short cycles are better than one long one.


University of Arizona benchmarks: 15 to 30% drainage, 60 to 120 ml (2 to 4 fl oz) per watering for a mature plant. The actual need depends on the plant, the heat and the light: measuring the drainage is what settles it.
6. Tutorial: four buckets on a patio
Time: half a day. Level: intermediate.
- Choose the spot: full sun for tomatoes and peppers, a wall or frame for staking, an outlet protected by a residual current device (GFCI), and a floor that can bear the weight (full buckets and reservoir).
- Lay the return: a rigid pipe on shims, with a gentle slope toward the reservoir. The buckets sit on top, outlet into the pipe.
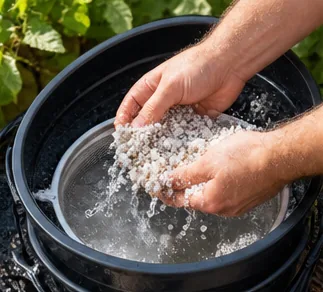
- Prepare the buckets: check the screen on each outlet, fill with rinsed growing medium (perlite and coco coir are rinsed before use to remove dust and salts).
- Set up the supply: pump in the opaque reservoir, filter, main line, one pressure-compensating dripper per plant stuck in near the stem, and a test dripper over a graduated container.
- Test with plain water: every dripper should flow, no leaks, the return should drain toward the reservoir.
- Plant: one plant per bucket, the crown level with the growing medium, the stake or string installed right away.
- Program: short cycles spread through the day, none at night; start with the calculator, then adjust after 24 hours of measuring drainage.
7. Maintenance
- Every day: a quick look at the drippers (are they all dripping?), the return and the reservoir level.
- Every week: measure the drainage, EC and pH of the drainage and the reservoir, clean the filter.
- As soon as a dripper weakens: clean or replace it; check for salt or lime deposits (Ohio State University).
- Between crops: fresh growing medium, buckets, tubing and drippers cleaned and disinfected (see cleaning and disinfecting). Reused growing medium is the leading cause of disease and pests in these systems (Oregon State University).

8. Common mistakes
| Mistake | Consequence | The fix |
|---|---|---|
| Watering with no drainage at all | Salt buildup, burned roots | 15 to 30% drainage, measured |
| One long cycle a day | Medium flooded, then dry | Several short cycles |
| Non-compensating drippers on a long line | The last buckets run short of water | Pressure-compensating drippers |
| No filter | Clogged drippers | Filter ahead of the line, cleaned every week |
| Return with no slope | Standing water, overflows | Gentle, continuous slope |
| Reusing the growing medium | Diseases and pests from the previous crop | Fresh growing medium |
| Translucent buckets or reservoir | Algae, clogged drippers | Everything opaque |
| Closed loop without measurements | Drifting EC and pH | Measure the reservoir and the drainage every week |
9. Key takeaways
Built your buckets? Show off your setup on the forum, with your cycle settings and your drainage percentage.
Frequently asked questions
What is a Dutch bucket?
A bucket of about ten liters (2.5 gal) filled with growing medium, fed by a dripper, with an outlet at the bottom connected to a shared return pipe. It is also called a Bato bucket. The outlet can be raised to keep a small reserve of water at the bottom (Oregon State University). The buckets are lined up and share the same reservoir and pump.
How long and how many times a day should drip irrigation run?
In small, frequent doses, and you set it by drainage: 15 to 30% of the solution applied should come out at the bottom of the buckets (University of Arizona). CEAC gives benchmarks of 60 to 120 ml (2 to 4 fl oz) per watering for a mature plant, and 40 to 50 ml six to eight times a day for a young plant. The hotter and brighter it is, the more cycles you need. The calculator in this article does the math.
Closed loop or drain to waste: which should I choose?
In a closed loop, drainage flows back to the reservoir: you save water and nutrients, but EC and pH drift and a root disease can spread from one bucket to the next. With drain to waste, drainage is collected separately (it can water ornamental plants): simpler and healthier, but more wasteful. For four to eight buckets on a patio, both make sense; the closed loop requires more regular measurements.
What growing medium should go in a Dutch bucket?
Perlite, coco coir, clay pebbles, or a mix: Oregon State University also lists washed gravel. The medium should drain fast while holding a little water. It is not reused from one crop to the next: according to the same source, that is the leading cause of disease and pest transmission in these systems.
Why do my drippers clog?
From particles of growing medium, algae, or salt and lime deposits. The fix: a filter ahead of the line, an opaque reservoir, a screen at the outlet of each bucket, and regular dripper checks, cleaning or replacing them as soon as they weaken (Ohio State University).
- M. Nelson II, G. Langellotto and L. Nackley, Oregon State University Extension, Hydro hints: buckets, EM 9456, 2025
- University of Arizona, Controlled Environment Agriculture Center (CEAC), chapter 10, Fertigation systems and nutrient solutions
- W. G. Owen, The Ohio State University, Drip irrigation strategies, Greenhouse Management, 2025
- R. Y. Evans, H. Lieth et al., University of California Davis, Irrigation in soilless production, in Soilless Culture: Theory and Practice
- G. K. Hutchinson et al., University of Georgia and Purdue University, Frontiers in Plant Science, 2025